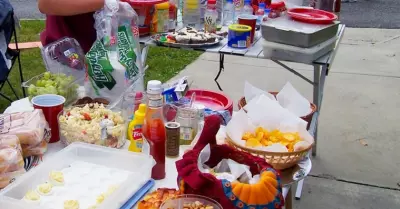
When it comes to tailgating, one of the first things that comes to mind is all the delicious food! We love to see all the next level dishes tailgaters come up with for tailgating snacks and dishes. However, we also know not everyone has time to craft such tasty foods. That doesn’t mean you still can’t make an impressive spread. In fact, with the right recipes, you can impress your guests with just a few minutes of prep time. Here is our master guide to fast, tasty, and easy tailgating recipes your teammates will love, whether you’re kicking back at the game parking lot or partying it up at home.
Easy Tailgating Recipes to Master The Basics
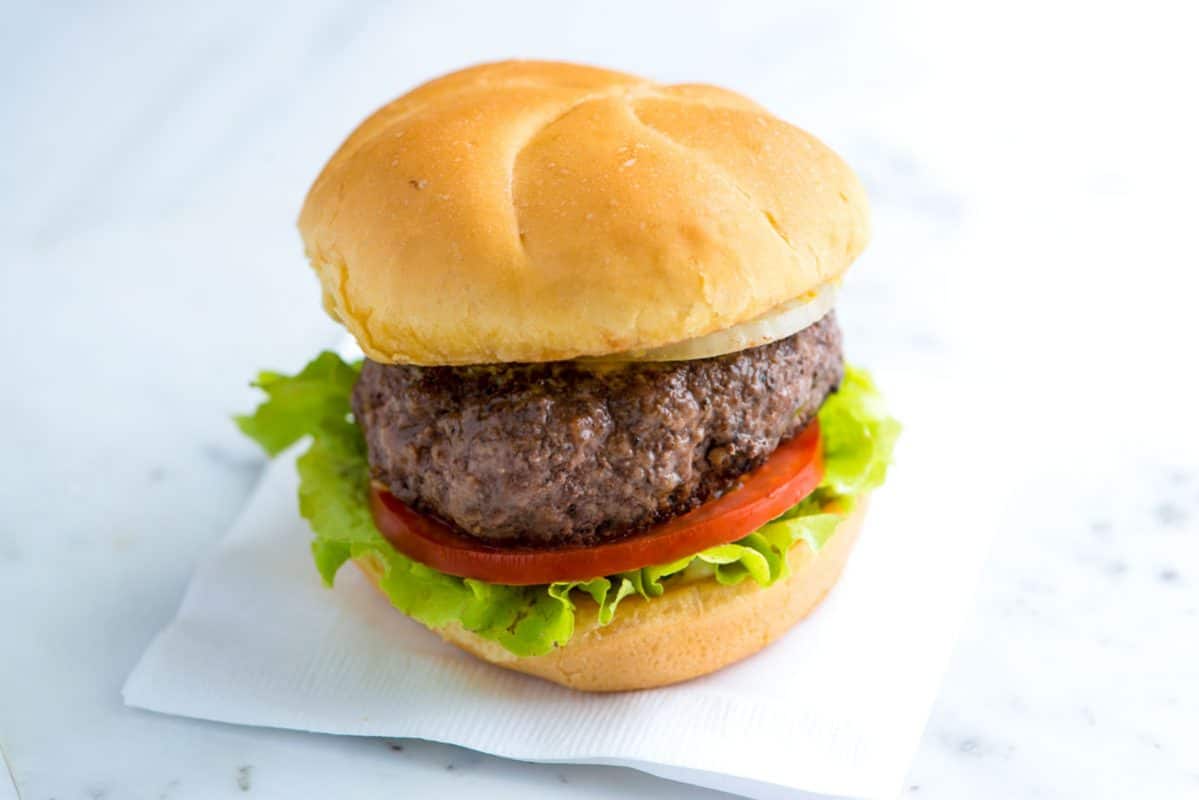
One of the best ways to save time when you are cooking is to master the basics. First we have the humber hamburger that with just a little attention and the right toppings can be a culinary masterpiece.
Sometimes we like to get fancy here at Inside Tailgating. A tailgate is a great time to explore the cooking and baking boundaries that are possible. It is okay to soar to new heights of culinary delights. We love it. Throw a fancy sushi appetizer in along with your relish slaw. Add a cream cheese brownie pie to your homemade ice cream treat. All that is good. In fact it is perfect.

But sometimes you just need to go simple. Sometimes a simple everyday hamburger (or cheeseburger) is just fine. Next time you can make the 100% steak burger recipe you have been wanting to try. Or add the black truffles or fancy, dancy mushrooms next time. But today we want a simple no nonsense burger.
Ingredients
- 1 Lb Ground Beef Chuck or Round
- Salt and Black Pepper
- Butter, as needed
Instructions
- Form beef into three 5 to 6 ounce hamburger patties. Use your thumb to imprint a dimple into the middle of each burger. (This prevents the middle of the burgers from puffing up while cooking). Season both sides of the hamburgers with salt and pepper.
- Melt 1 tablespoon of butter in a cast iron pan over medium heat. Cook hamburger patties 3 to 4 minutes on each side, depending on how well done you like it.
- Rest burgers covered loosely with aluminum foil for 5 minutes then serve on a buttered bun with lettuce, tomatoes and onion (or how you like it).
Notes
Ingredients
- 8 Oz Chuck, trimmed, cut into 1 1/2 inch cubes
- 8 Oz Sirloin, trimmed, cut into 1 1/2 inch cubes
- 1/2 Tsp Kosher Salt
Instructions
- In separate batches, pulse the chuck and the sirloin in a food processor 10 times.
- Combine the chuck, sirloin, and kosher salt in a large bowl.
- Form the meat into 5-ounce patties.
- Heat a cast iron skillet or griddle over medium-high heat for 2 to 3 minutes.
- Place the hamburger patties in the pan.
- For medium-rare burgers, cook the patties for 4 minutes on each side. For medium burgers, cook the patties for 5 minutes on each side.
- Flip the burgers only once during cooking.
Notes

Ingredients
- 1 Lb Ground Beef Chuck
- 2 1/2 Tsp Burger Seasoning
- 4 Hamburger Buns, for serving
Instructions
- Combine ground beef and seasoning blend in a bowl and mix gently but thoroughly to combine. Divide mixture into 4 even portions and pat each portion into a flattened patty.
- Preheat grill to medium high. Grill beef burgers about 3 to 4 minutes per side for medium rare.
- Alternatively, heat a broiler to 500 degrees F and position an oven rack about 6 inches from the broiler unit.
- Line a baking sheet with aluminum foil and position an ovenproof rack on top of the baking sheet. Place the burgers on the rack and broil until just cooked through, 6 to 7 minutes
- Remove and serve burgers on buns garnished with desired condiments.
Notes
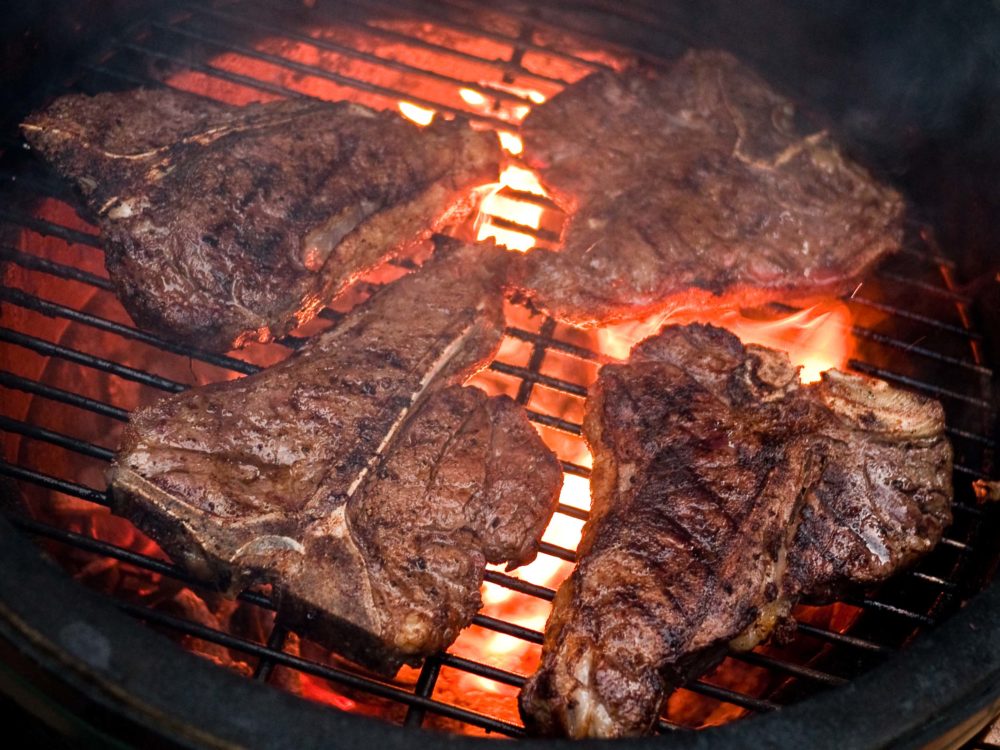
Burgers aren’t the only basic to master. Another great place to start is to master a simple grilled steak. A perfectly grilled steak doesn’t need any extras, but it does make a great base for steak sandwiches, carne asada tacos, and sliders.
If you do choose to get somewhat fancy, why not add a nice bleu cheese topping:
● Blend together blue cheese and butter in a small bowl until creamy.
● Equally divide blue cheese mixture over steaks.
Ingredients
- Ribeye, Strip, T-Bone, or Filet
Instructions
- Heat your grill to about 500°F. Rub the grates with a towel dipped in vegetable oil.
- Season it on all sides with salt and pepper.
- When the grill is ready, place the steak on the grates. Cook, undisturbed, until grill marks appear on the bottom. Flip and cook until the steak’s medium rare. (To check for doneness, use your finger to press on the meat: It should be firm around the edges but still give in the center.)
- Remove it from the grill and let it rest for at least 5 minutes before serving.
Build Some Delicious Burgers
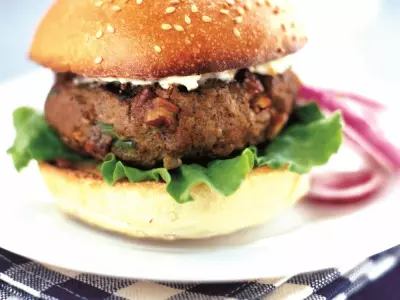
Once you have your burger basics mastered, there’s a lot you can do with them to impress your guests. Adding a few ingredients to the ground meat or loading it up with toppings—like various cheeses, veggies, and sauces—takes no time. Be warned though, there’s a risk of your guests overeating when you serve these tasty burgers.
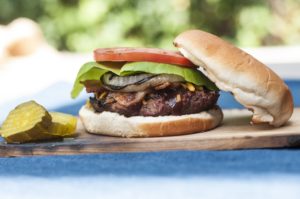
Check out our ode to Texas with the Stubb’s Cowboy burger and the creative Toasted Pecan burger.
Ingredients
- 2.5 Lbs Ground Beef
- 1/4 Cup Stubb's Smokey Mesquite Bar-B-Q Sauce
- 2 Tbsp Stubb's Beef Marinade
- 1/4 Tsp Stubb's Mesquite Liquid Smoke
- 1 Tsp Stubb's Beef Rub
- 1 Large Yellow Onion, cut into slices
- Shredded Cheddar Cheese
- Bacon Slices, cooked crisp
- Onion Rolls or Hamburger Buns
- Toppings Of Your Choice
Instructions
- In a large bowl, combine the ground beef, Bar-B-Q sauce, Stubb’s Beef Marinade, liquid smoke (optional) and Stubb’s Beef Spice Rub. Use your hands to mix well. Once combined, separate the mixture to make six patties. Make a slight indent with your thumb in middle of each patty to keep it from swelling while on the grill.
- Prepare your grill for direct medium-heat cooking. Lightly oil the grates and place your burger on the grill, indent side up. Cook burgers for 12-14 minutes or until preferred doneness (160°F) turning once during cooking. While burgers are cooking, add the onion slices to the grill and cook until lightly charred and soft, turning once. Also toast the buns.
- To serve, top burgers with Bar-B-Q sauce, bacon, grilled onion and shredded cheese. Add additional toppings to your liking.
- TIP: To cook the bacon for this burger, you can cook ahead at home by line a baking sheet with aluminum foil and laying bacon on top. Cook in a preheated oven at 375°F for 15-20 minutes. Transfer the bacon to a paper towel lined plate to cool. (And a tip from Inside Tailgating: If you want to cook the bacon at your tailgate, use the cool area of your charcoal grill – the part with no coals underneath – to prevent flare-ups and lightly grease the grate. Using tongs, lay bacon perpendicular to the bars of the grate.)
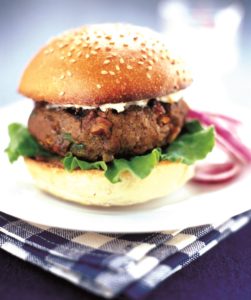
Ingredients
- 1 Lb Ground Chuck
- 1/4 Cup Chopped Red Onion
- 1/4 Cup Chopped Pecans, toasted
- 1 Tbsp Finely Chopped Green Bell Pepper
- 3 Tbsp Stubb's Original Bar-B-Q Sauce
- 2 Tbsp Stubb's Bar-B-Q Spice Rub
- Lettuce, Mayonnaise, and Toasted Buns, for serving
Instructions
- Mix together the chuck, onion, pecans, bell pepper, Stubb’s Original Bar-B-Q Sauce, and Stubb’s Bar-B-Q Spice Rub. Shape into 3 large or 4 average-sized patties. (The burgers may be mixed and shaped earlier in the day; refrigerate until ready to use.)
- Prepare a grill for direct cooking. For a charcoal grill, when the coals are ashed over, rake or spread them out in the bottom of the grill so the food can cook directly over the coals. (For a gas grill, fire up the burners so the food can cook directly over the heat.)
- Grill the burgers over direct medium heat, first on one side then on the other, 7 to 10 minutes, until they reach your desired degree of doneness. (Medium burgers register an internal temperature of 160°F.) Serve with lettuce, mayonnaise and toasted buns.
If you’re like me and you don’t feel like getting super elaborate yet in your tailgate fare, you can certainly jazz up the ‘ol standby: the burger. Makes your mouth water just typing them.
Pull Out The Crockpot

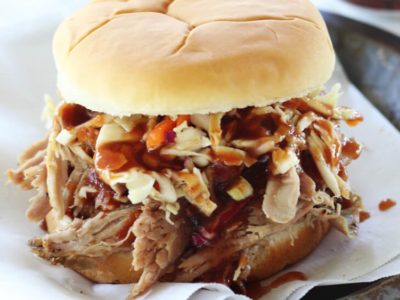
Crockpots and instapots are the perfect tool for easy Super Bowl menu planning. There are so many things you can make in a slow cooker. The best part is you add the ingredients then set it and forget it until it’s time to serve. We love slow cookers for pulled pork, so we’re sharing one of our favorites from the archives:
Try this recipe for delicious pulled pork sandwiches with root beer BBQ sauce from our friend Teri Stephens at Buy This Cook That.
Ingredients
- 8 Lbs Pork Shoulder Roast
- 2/3 Cup Mustard
- 2/3 Cup BBQ Spice Rub
- 12 Oz A&W Root Beer
- 3/4 Cup Ketchup
- 1/2 Cup Honey
- 1/3 Cup Apple Cider Vinegar
- 2 Tsp Liquid Smoke
- 1/2 Tsp Black Pepper
- 1/2 Tsp Chili Powder
- 1/2 Tsp Garlic Powder
- 1/2 Tsp Onion Powder
Instructions
- Coat the pork roast with yellow mustard, being sure to coat all of the surface area well. Sprinkle well with dry rub on all sides. Wrap tightly in aluminum foil and refrigerate for an hour to overnight.
- When you are ready to start cooking, unwrap the pork and place in a slow cooker or roaster set on 275 degrees Fahrenheit.
- Slowly cook the pork for several hours or overnight until it pulls apart easily. Halfway through the cooking process, carefully turn the pork roast once.
- Once the pork is done, transfer to a large aluminum pan and pull apart with your hands or forks. Sprinkle with extra rub and ladle some of the cooking juices over the top. Cover with foil and poke a few small slits into the foil.
- In a small aluminum pan, cover two handfuls of wood chips with cold water.Prepare a charcoal grill and let the briquets turn gray. Place the foil covered pan(s) of pulled pork and the soaked wood chips on the grill for INDIRECT HEAT and cover. The smoke from the wood chips and charcoal will seep into the pulled pork for smokey flavor. Smoke for 20 minutes.
- For the A&W Root Beer BBQ Sauce, combine the root beer, ketchup and all sauce ingredients in a sauce pan. Bring to a low boil, stirring frequently. Reduce heat to low; simmer for 15 minutes stirring occasionally. Cool and transfer to a glass jar for serving and storage.
- Serve the slow cooker pulled pork on buns with your favorite slaw and a generous helping of the root beer bbq sauce.
If BBQ ribs are more your style, check out a great recipe here, or if you like a smokey jerk style sauce, try this recipe.
Save Time With Sliders
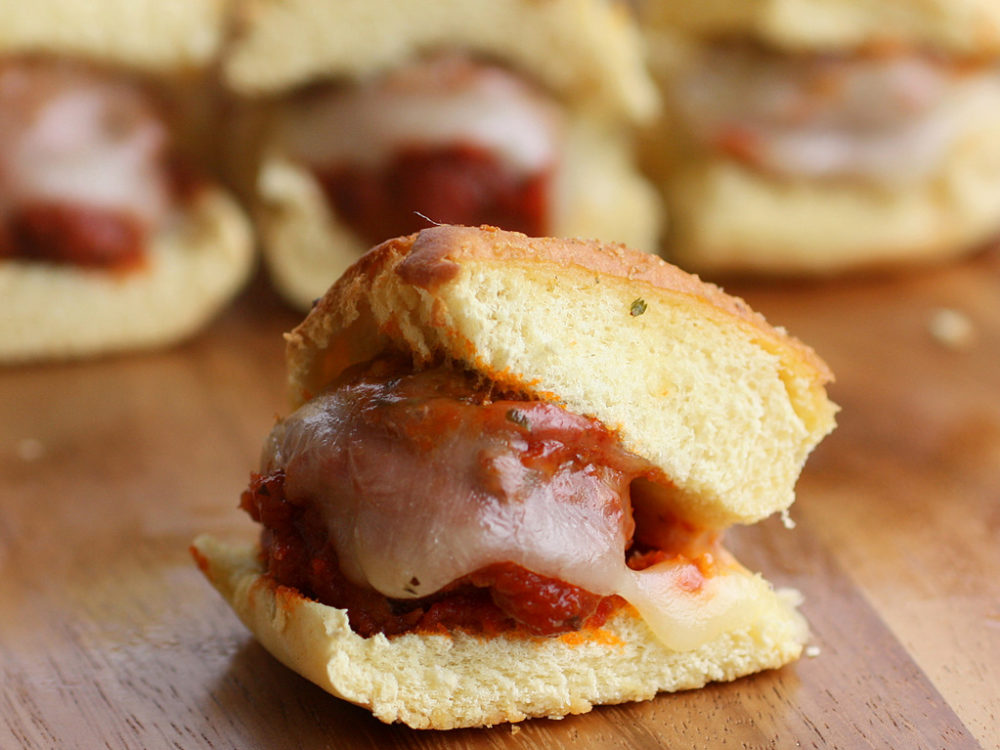
Some of us just aren’t chefs and that’s okay. It doesn’t mean we still can’t serve up tasty tailgating snacks for our team. If you’re just lost in the kitchen, we highly recommend these meatball sliders. They are easy enough for anyone to make. Make two pans though because these go crazy fast!
Ingredients
- 2 Lbs Ground Turkey or Lean Ground Beef
- 1/2 Cup Finely Diced Onion
- 1/2 Tbsp Chicken Spice Rub
- 1/2 Cup Breadcrumbs
- 1 Egg, beaten
- 1 Bottle BBQ Sauce
- 12 Slider Buns
Instructions
- Preheat oven to 400°F.
- In a large bowl, add the first five ingredients and mix well with your hands.
- Roll into 12 large meatballs of equal size.
- Place on a baking sheet and cook for 20-25 minutes until cooked to an internal temp of 165°F (160°F for beef).
- Warm Bar-B-Q Sauce in an saucepan over medium heat.
- Place meatballs into buns and top with warm Sweet Heat Bar-B-Q Sauce.
What is not to love about sliders? They’re little, and always packed full of flavor. And these sweet and spicy meatball sliders are no exception! The meatballs are really easy to make, and the sauce is nothing short of amazing. These meatballs are really easy to make.
Grill Up Your Sides
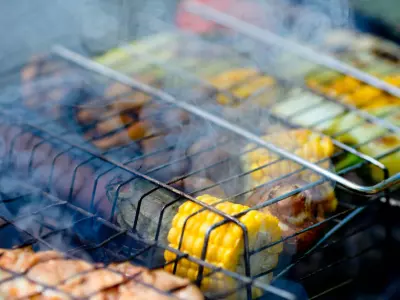
When it comes to easy tailgating snacks, your grill is your best friend. You can make all of these sides while you grill up your dogs, burgers, or steaks. Most of them can even be prepared the night before.
When you are out tailgating, you want to focus on having fun and preparing for the big game. So putting together a fast and easy spread for you and fellow fans is a must. Fortunately, there are a ton of great things you can make on your tailgating grill that are delicious and take only a few minutes to make.
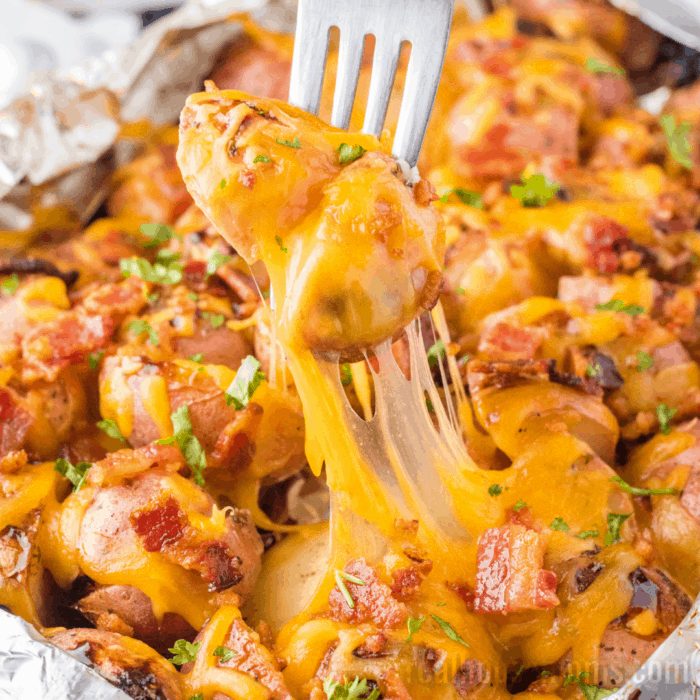
1. GRILLED RANCH POTATOES
Equipment
- Large mixing bowl
Ingredients
- 2 Lbs Red Potatoes
- 2 Tbsp Vegetable Oil
- 3 Tbsp Ranch Dressing Mix
- 1/4 Tsp Salt
- 1/8 Tsp Pepper
- 1/2 Cup Cheddar Cheese
- 3 Strips Bacon, cooked and crumbled
- 1 Tbsp Chopped Parsley
Instructions
- Preheat grill to medium heat or 400 degrees F.
- Add potatoes to a large mixing bowl. Drizzle with oil and stir to coat. Add salt, pepper, and ranch mix. Stir until the potatoes are well coated.
- Transfer potatoes to a square sheet of heavy-duty aluminum foil. (Don't use the regular kind, it'll break!) Group together in the center of the foil. Fold one side over the potatoes and then the other side so they are overlapping. This will create a long rectangle. Fold up the ends to seal everything in.
- Place potato packet on the hot grill, seam side up. Grill for 10 minutes. Flip and grill for another 10 minutes. Remove from heat.
- Place potato packet on a serving plater and cut an uppercase I in the middle of the foil. Carefully open the sides of the foil pack and fold them down. Sprinkle the potatoes with cheese, bacon, and parsley. Serve immediately.
Notes
- If using mini red potatoes, cut in half lengthwise. If using regular red potatoes, cut into quarters (bite-sized pieces).
- I cooked my bacon in the oven while the potatoes grill. You could cook your bacon on the grill if you prefer. Once the cheese is added to the potatoes, place the plate in the warm oven to help the cheese melt.
- You can serve these potatoes right out of the foil or transfer them to a serving bowl before adding toppings.
These grilled ranch potatoes are sure to be a touchdown at your tailgate. You simply cut the potatoes, cover them in oil and ranch seasoning and throw them on the grill in a foil packet. The best part is these can be made ahead of time and just tossed on the grill right before game time.
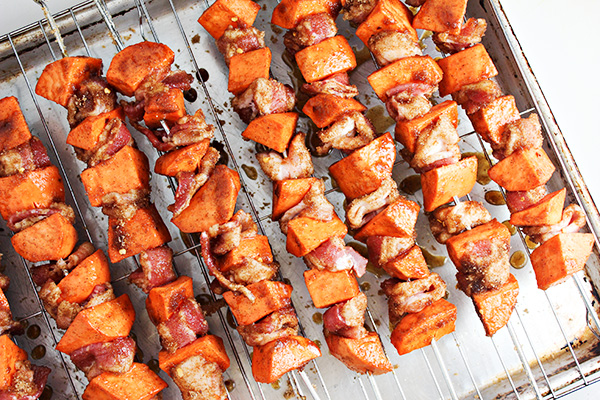
2. SWEET POTATO AND BACON SKEWERS
Equipment
- Oven Safe Cooking Racks
- Large Baking Sheet
- Large Bowl
Ingredients
- 2 Lbs Sweet Potatoes (peeled and cut into 1 1/2" chunks)
- 1 1/2 Tbsp Olive Oil
- 1 Lb Sliced Bacon
- 3/4 Cup Light Brown Sugar
- 1/4 Cup Sugar
- 1/2 Tsp Ground Cinnamon
- 1/2 Tsp Ground Nutmeg
- 1/4 Tsp Cloves
- 1/4 Tsp Cayenne Pepper
- 1/2 Tsp Crushed Red Pepper Flakes
Instructions
- Place oven-safe cooking racks on top of a large rimmed baking sheet. Spray with cooking spray. Preheat oven to 375 degrees F.
- Place cut sweet potatoes in a bowl. Drizzle with olive oil and toss to combine. Set aside.
- Without separating bacon slices into individual pieces, cut entire slab of bacon slices into fourths (when laying horizontally in front of you). This is easiest by cutting slab in half and then cutting each of those portions in half again.
- In a small bowl, combine sugars and spices. Pour spiced sugar mixture onto a large, rimmed baking sheet.
- With metal skewer, slide on a chunk of sweet potato, then 1 small piece of bacon (which is 1/4th of a bacon slice) that has been folded in half (or smaller if necessary). Make sure to leave a tiny bit of room between each bacon slice and potato chuck to allow even cooking (don’t push them tightly together). Repeat pattern until you have about 7 pieces of sweet potato and 6 pieces of bacon on each skewer.
- Roll each skewer in the spiced sugar mixture. You may want to use your hand to hold some of the spiced sugar to press more of it onto the potatoes and bacon. Tap your skewer gently to remove any excess spiced sugar. Place skewer on top of the the cooling racks on your prepared baking sheet. Repeat with remaining skewers. Discard any remaining spiced sugar.
- Bake skewers for about 30 minutes, or until potatoes are tender and bacon is fully cooked.
Notes
We love grilling kabobs, they’re so easy to make and taste great. These sweet potato and bacon skewers are a delicious twist on a grilled kabob. The sweet soft potatoes balance beautifully against the crispy salty bacon. They can also be made ahead and grilled at game time.
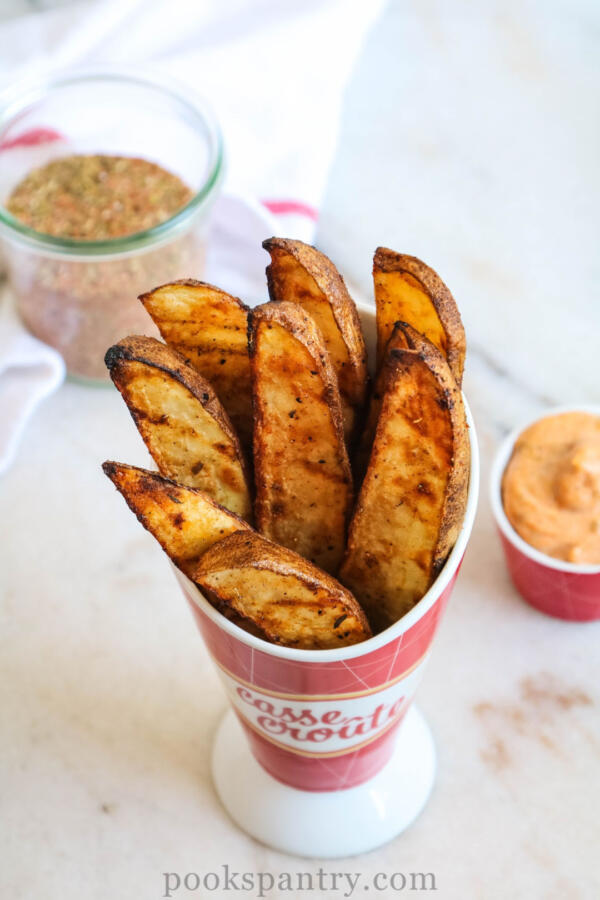
3. CAJUN GRILLED POTATO WEDGES
Equipment
- Medium Mixing Bowl
Ingredients
- 5 Lbs Idaho Russet Potatoes
- 2 Tbsp Olive Oil
- 5 Tbsp Cajun Spice Blend, divided
- 1 Cup Mayonnaise, optional
Instructions
- Preheat grill to 400°F
- Cut potatoes into wedges – slice the potato in half lengthwise, then cut each piece in half again to create quarters. Cut each quarter in half or into thirds if the potato is very large.
- In a medium mixing bowl, toss potato wedges with olive oil and set aside.
- In a small mixing bowl, combine all ingredients for Cajun spice blend and whisk to combine thoroughly.
- Sprinkle 3 – 4 tablespoons of the spice blend over the potato wedges and toss to combine. (Use 3 tbsp if you don't like strong seasoning, 4 tbsp if you do)
- Place potato wedges on grill and cook for 10 minutes. Flip potatoes over and cook for an additional 10 minutes (lowering temperature of the grill if necessary), or until potatoes are cooked through.
- Make dipping sauce by combining 1 cup mayonnaise with 1 tablespoon of spice blend and stir to combine.
- Serve warm with dipping sauce, if desired.
Notes
If you’re making steaks or burgers, these Cajun potato wedges are the perfect side or a crowd-pleasing finger food all on its own. They are so easy to make. You simply cut them up, spice them up, and throw them right on your tailgating grill. They taste just like the rich potato wedges you get at your favorite steakhouse, but with a Cajun twist.
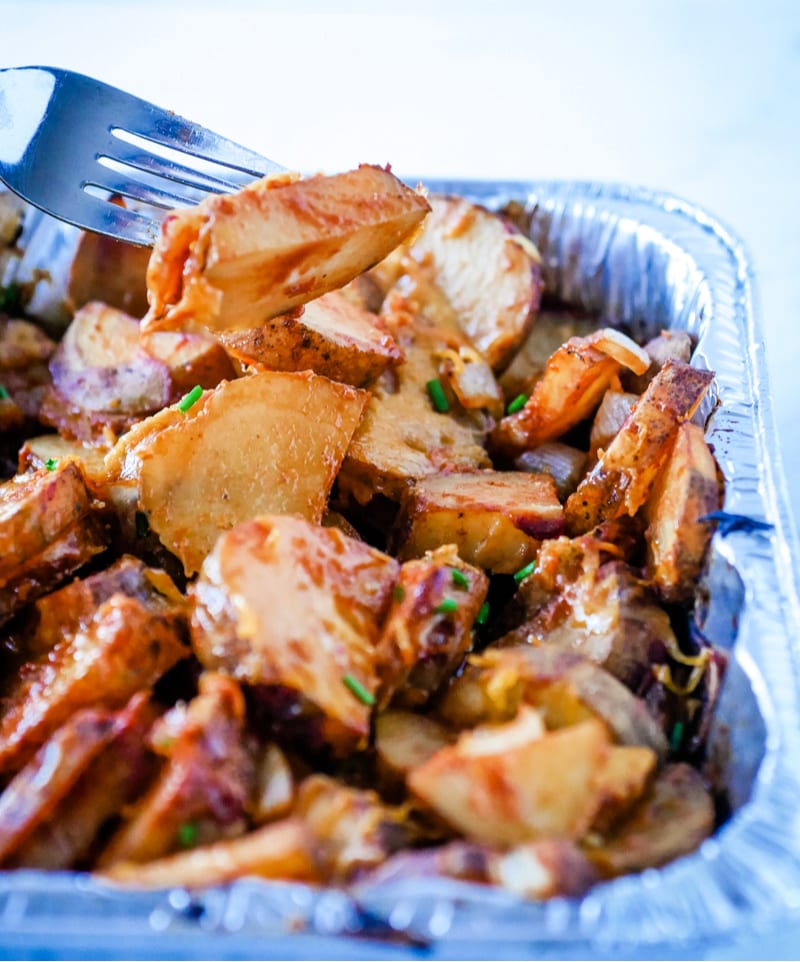
4. CHEESY GRILLED POTATOES
Ingredients
- 2 Lbs Potatoes
- 1/2 Onion
- 1 1/2 Cup Shredded Cheddar Cheese, divided
- 1/3 Cup Barbecue Sauce
- 1/2 Cup Bacon Bits
Instructions
- You can make these potatoes in either a foil packet or a foil roasting pan.
- Spray a foil roasting pan with cooking spray. Or lay out a piece of aluminum foil and spray it with cooking spray.
- Slice the potatoes into thin slices and place in the foil roasting pan or on the foil. Slice them thin, about 1/8 of an inch is ideal.
- Slice the onion and add on top of the potatoes.
- Pour the barbecue sauce over top of the potatoes.
- Sprinkle half of the cheese on top of the potatoes and put the other half aside for later.
- Mix it all together and cover the pan with foil if using a roasting pan. If using a foil packet put another sheet of foil over the top and crimp the edges to seal the packet.
- Put the potatoes on the grill on medium and let the cook. If using a foil roasting pan it will take about 45-60 minutes to cook. If using a foil packet it will take 15-20 minutes. Shake the pan occasionally or flip the foil packet halfway through.
- The time to cook the potatoes will vary based on how hot your grill is and how thing you sliced the potatoes. The potatoes are done when a form goes into them easily.
- Once the potatoes are cooked remove the potatoes from the grill and add the rest of the cheese.
- Cover and let them rest for 5 more minutes to melt the cheese.
- Add the bacon right before serving.
Notes
Has there ever been a greater pairing than potatoes and cheese? These cheesy grilled potatoes can be made ahead in a pan that can be easily transported to the event. They cook quickly and are a huge crowd favorite. We recommend dipping them in a little ranch dressing to set them off, or, top with your favorite hot sauce for a spicy kick!
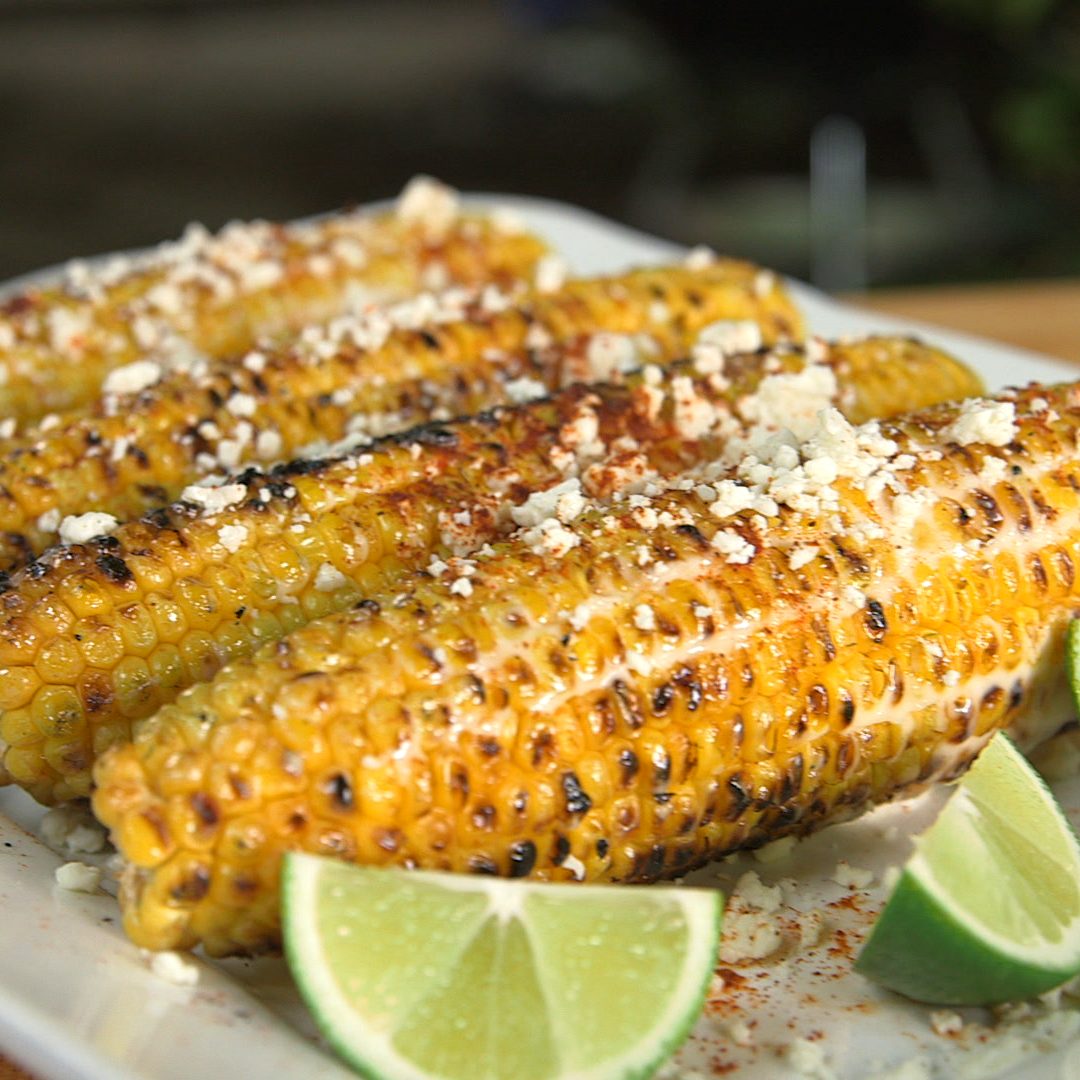
5. ELOTE (MEXICAN GRILLED CORN)
Equipment
- Pastry Brush
Ingredients
- Vegetable Oil, for brushing
- 1 Tsp Chile Powder
- 1/2 Tsp Cayenne Powder
- 8 Ears Of Corn, Husked
- 1/4 Cup Mayonnaise or Unsalted Butter
- 1/2 Cup Crumbled Cotija Cheese, Parmesan, or Ricotta
- 1 Lime, cut into 8 wedges
Instructions
- Build a medium-hot fire in a charcoal grill or heat a gas grill to high. Brush grill grate with oil. Combine chile powder and cayenne in a small bowl.
- Grill corn, turning occasionally with tongs, until cooked through and lightly charred, about 10 minutes. Remove from grill and immediately brush each ear with 1½ tsp. mayonnaise. Sprinkle each with 1 Tbsp. cheese and a pinch of chile powder mixture. Squeeze 1 lime wedge over each ear and serve.
Notes
Elote is a favorite Mexican street food. It’s a grilled corn cob smothered in crema, mayonnaise, and crumbly cheese. Then topped with a little lime and chili powder. It can be served right on the cob or you can toss it into a cup for less mess. However, you eat it, it’s the perfect side dish to make on your tailgating grill.
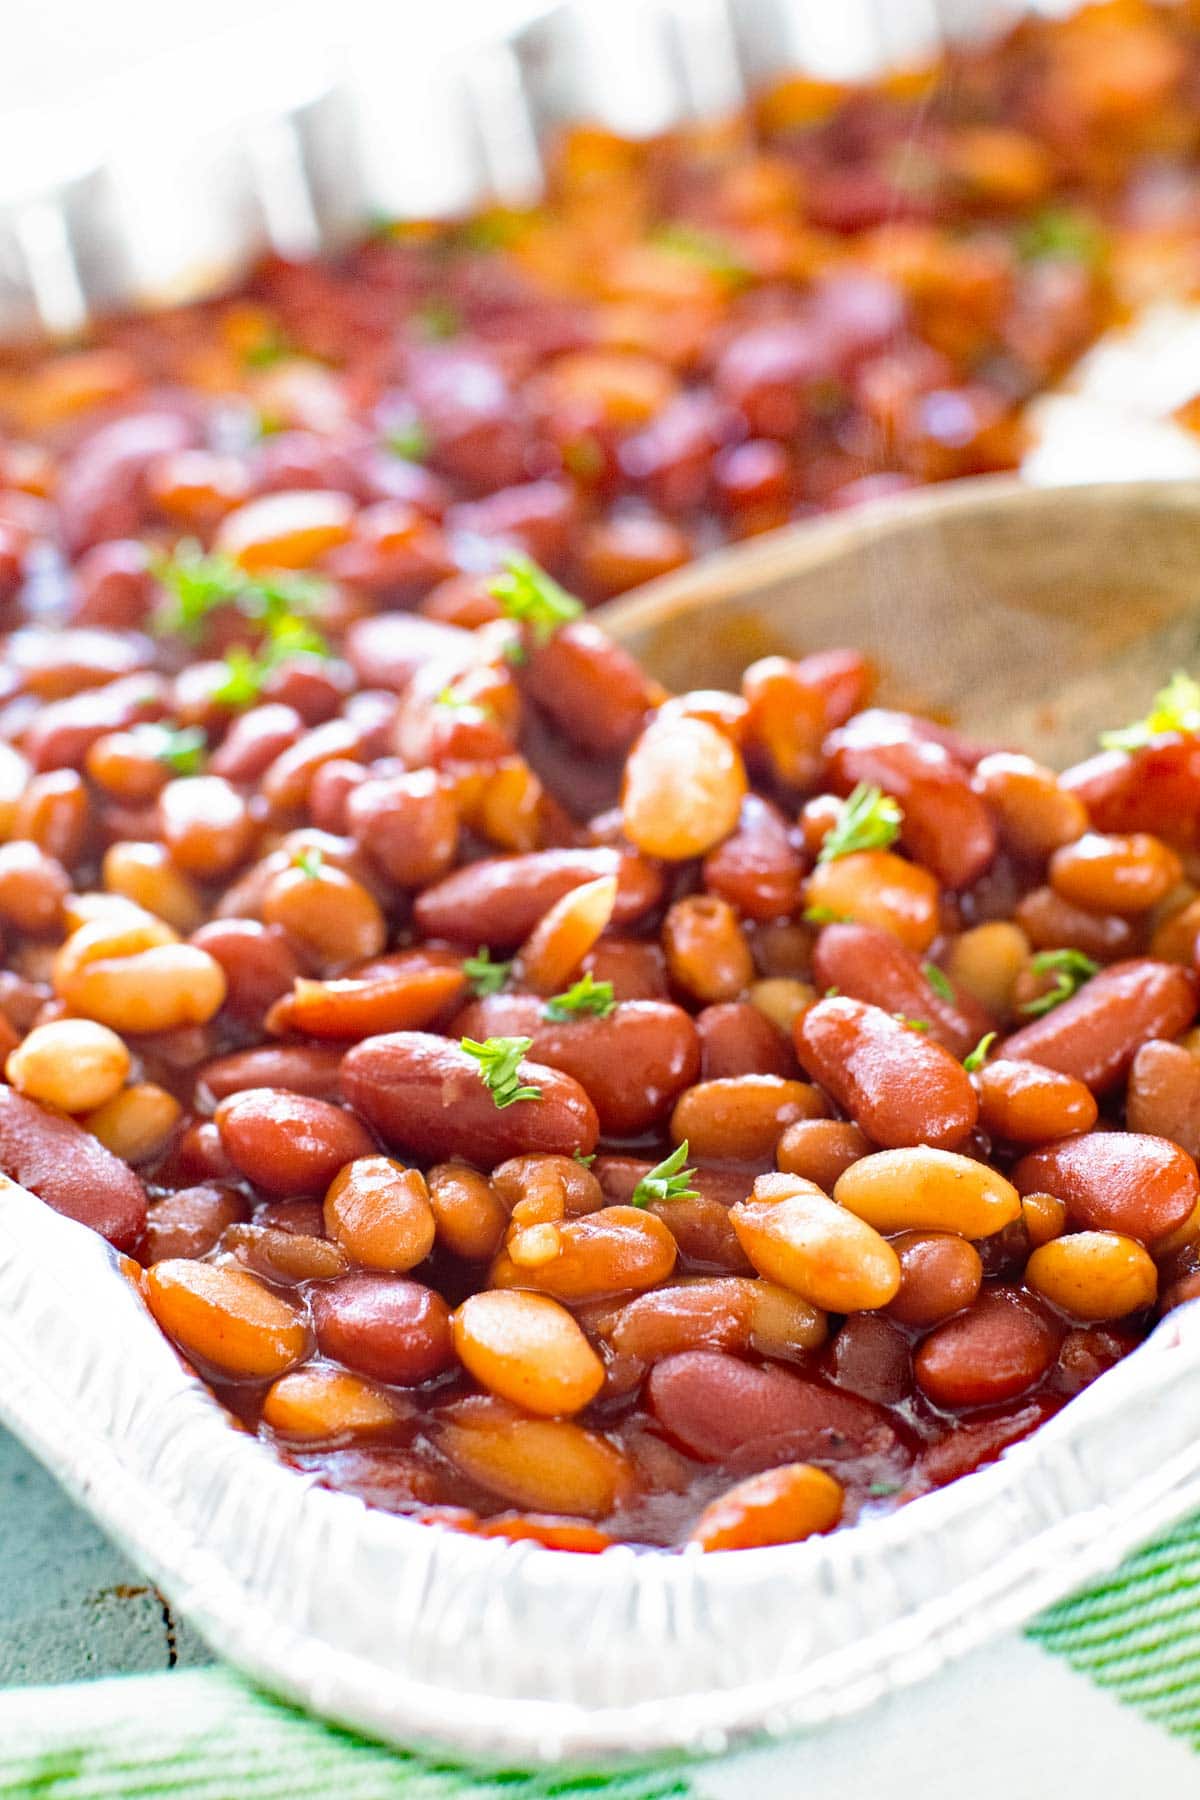
6. BBQ BAKED BEANS
Equipment
- 8" x 8" Disposable Pan
Ingredients
- 16 Oz Canned Kidney Beans, drained and rinsed
- 15.8 Oz Canned Northern White Beans, drained and rinsed
- 28 Oz Canned Barbecue Baked Beans
- 1/2 Cup Barbecue Sauce
- 2 Tbsp Brown Sugar
- 2sp Tsp Smoked Paprika
Instructions
- Preheat grill to 350 degrees.
- Combine all ingredients in 8'' x 8'' disposable pan. Cover with tin foil.
- Place on grill for 15-20 minutes or until heated through.
Notes
BBQ baked beans can also be made right on the grill. This recipe combines a variety of beans and beans to make an outstanding homemade dish. However, this technique also works on your favorite canned BBQ baked beans. So you can make it even easier if you are pressed for time.
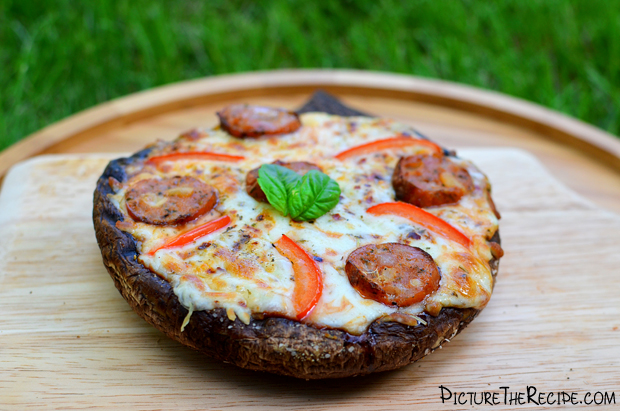
7. GRILLED PORTOBELLO MUSHROOM PIZZA
Ingredients
- Portobello Mushrooms
- Olive Oil
- Salt & Pepper
- Garlic Powder
- Pizza Sauce
- Mozzarella Cheese
- Italian Herb Seasoning
- Red Pepper Flakes
- Toppings Of Choice
Instructions
- Start by cleaning the mushrooms. To to do this, first gently pull out the stem by twisting and pulling on it. Then, scrape out the gills (optional, it’s not necessary) with spoon. Then wash the mushrooms clean (you can use a damp cloth, but I just prefer washing them) and pat them dry with some paper towels.
- In the meantime get your grill going.
- Generously drizzle some olive oil over both sides of the mushrooms and rub it around with your fingers.
- Season the mushroom well on both sides with salt, garlic powder and black pepper.
- Once your grill is heated and your ready to go, cook the mushrooms bowl side (cavity side) down for 7-8 minutes.
- Then take the mushrooms off the grill and prepare the pizza part of this recipe.
- Smother some pizza sauce into the mushroom cavity. Top with some fresh chopped basil and fill it up with some grated mozzarella cheese.
- Next, sprinkle over some Italian herb seasoning and crushed red pepper flakes.
- Then add whatever toppings you want on your pizza like sun-dried tomatoes, pepperoni, red pepper, onion, bacon…whatever you like really. I had some chicken sausage on hand so I used that with some red pepper.
- Then place the mushrooms back on the grill (filling side up obviously) and cook the mushroom for another 8-10 minutes (with the lid closed) until the cheese is bubbly and melted.
- Serve the pizzas hot with some fresh basil as garnish…mmmm!
Notes
We love pizza at a tailgate. This recipe uses portobello mushrooms instead of pizza crust so no need to sweat the carbs. They are super easy to assemble and can be loaded with your favorite pizza toppings. Though we don’t always think of pizza as a side, these portobello pizzas are the perfect size to serve with your main entree or just as a snack.
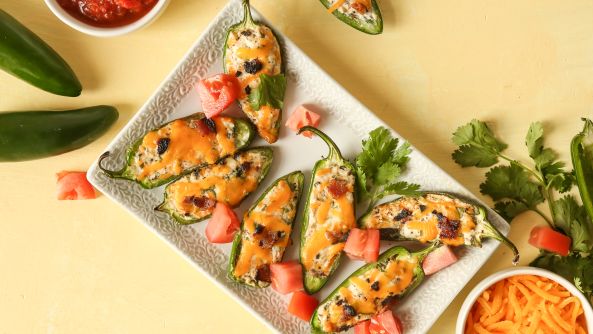
8. GRILLED STUFFED JALAPENOS
Ingredients
- 14 Jalapeno Peppers, halved lengthwise and seeded
- 2 Slices Center Cut Bacon
- 1/2 Cup Cream Cheese, Softened
- 1/4 Cup Shredded Extra Sharp Cheddar Cheese
- 1/4 Cup Minced Green Onion
- 1 Tsp Fresh Lime Juice
- 1/4 Tsp Salt
- 1 Small Garlic Clove, minced
- 2 Tbsp Fresh Cilantro
- 2 Tbsp Chopped Seeded Tomatoes
Instructions
- Preheat grill to medium-high heat.
- Cook bacon in a skillet over medium heat until crispy.
- Remove bacon, and drain on paper towels, and crumble bacon.
- Combine bacon, cheeses, and the next 4 ingredients through garlic in a bowl, stirring to combine.
- Divide cheese evenly, and fill pepper halves.
- Place peppers cheese side up on grill, cover and grill peppers 8 minutes, or until bottoms of peppers are charred, and cheese mixture is lightly browned.
- Place peppers on serving platter.
- Sprinkle with tomato, and cilantro.
Notes
For those of you like us that love spicy food, these stuffed jalapeños are the perfect dish to make on your tailgating grill. If you don’t love spicy food, you can still make this dish. This recipe is super flexible. You can use sweet or spicy peppers. You can even change up the stuffing if you’d like. Either way, they are the perfect side for game day.
9. PORK SHOOTERS
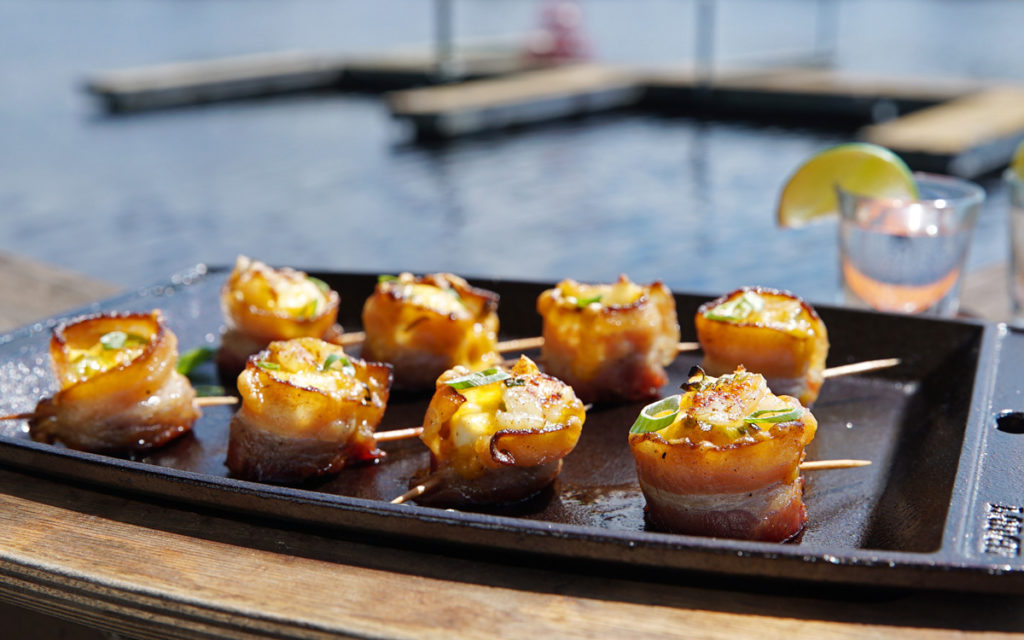
Ingredients
- 1 Lb Kielbasa Or Andouille
- 8 Slices Thick Cut Bacon, halved crosswise
- 8 Oz Cream Cheese, cubed
- 8 Oz Coarsely Grated Sharp Cheddar Cheese
- 4 Scallions, trimmed
- 1/2 Lb Shrimp, peeled and diced into 1/2 inch pieces
- 2 Tsp Old Bay Seasoning
Instructions
- Make the kielbasa and bacon “shot glasses.” Slice the kielbasa crosswise into rounds about 1/4-inch thick. Wrap each snugly with 1/2 slice of bacon; pin with a toothpick. Repeat with the remaining rounds of kielbasa.
- Fill each “shot glass” with a cube or two of cream cheese, cheddar cheese, scallions, and shrimp, leaving some space at the top (the bacon will shrink as it cooks). Top with Old Bay.
- Set up your smoker according to the manufacturer’s directions, or set up your grill for indirect grilling and heat to 400 degrees. (The higher temperature will render the fat from the bacon.) Arrange the shots on the grill grate (use a perforated disposable grill pan for easier clean-up, if desired) and cook for 15 to 20 minutes or as needed, until the bacon is crisp and the filling is bubbling. Let cool for 5 minutes, then remove the toothpicks. Sprinkle with the remaining scallion greens and serve.
Notes
If you have a meat lover on your tailgating team, this is the perfect side. Kielbasa wrapped in bacon and grilled with shrimp is a meat lovers paradise. Topped with two kinds of cheese and some Old Bay seasoning these will be a huge favorite. We definitely recommend making a double batch because these tasty shooters go quickly!
10. GRILLED BUFFALO CHICKEN POPPERS
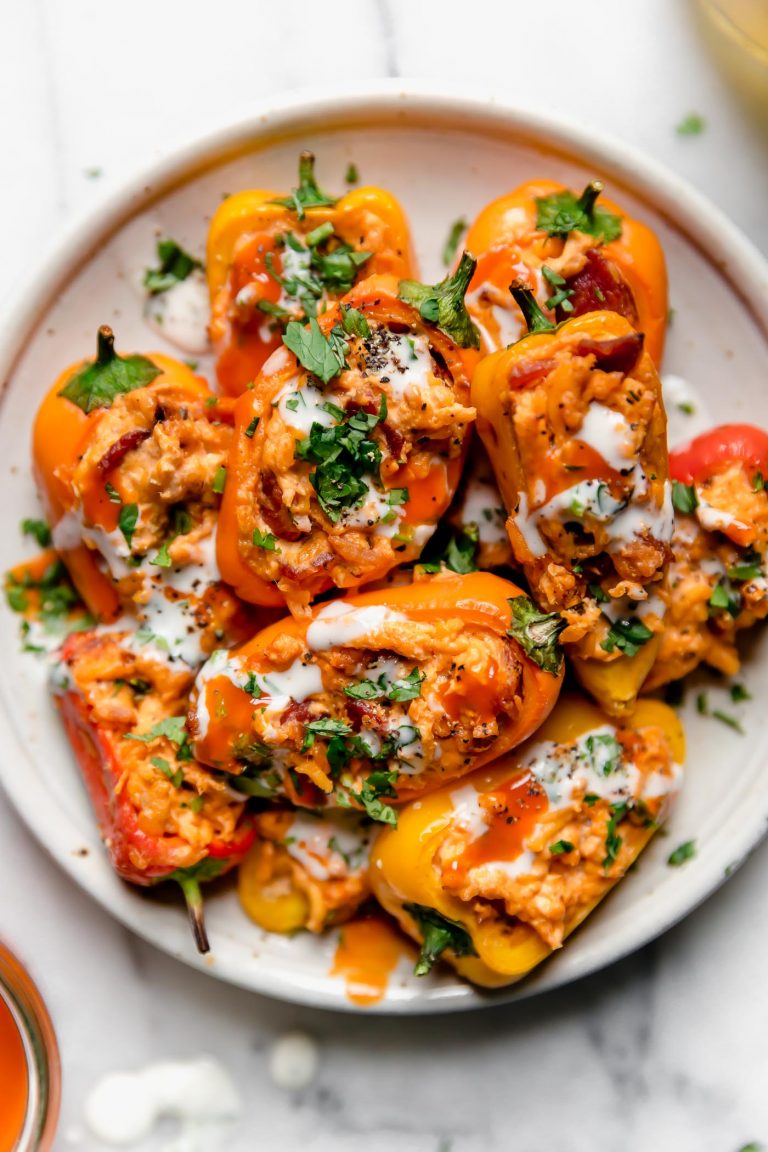
Ingredients
- 6 Slices Center Cut Bacon, cut into 1/4 inch strips
- 10-12 Mini Sweet Peppers
- 4 Oz Cream Cheese, softened
- 1 Cup Shredded Chicken
- 1/2 Cup Shredded Cheddar
- 1/4 Cup Buffalo Sauce
Instructions
- Cook the bacon: Add the bacon to a skillet over medium heat. Cook, stirring occasionally, until the bacon is rendered & crisp. Use a slotted spoon to carefully transfer the bacon to a paper towel-lined plate. Set aside.
- Slice the peppers: Use a small knife to remove 1/3 of each pepper lengthwise (reference photos, above). Use a small spoon or a finger to remove the seeds & any excess ribs from the inside of the pepper. Trim any excess stems as needed. Set aside.
- Make the buffalo chicken filling: Add the bacon, cream cheese, chicken, cheddar, and buffalo sauce to a medium bowl. Use an electric mixer or wooden spoon to combine.
- Assemble the buffalo chicken poppers: Spoon 1-2 tablespoons of the buffalo chicken mixture into each prepared pepper. Use the back of the spoon or your fingers, as needed, to press the buffalo chicken filling into the nooks & crannies of the pepper.
- Chill: Place the assembled buffalo chicken poppers in the fridge to set for at least 1 hour, or the freezer for at least 20 minutes.
- Preheat your grill: Prepare your grill for medium heat, about 450 degrees F. For this recipe, I used my Weber 22-inch Original Kettle Grill from The Home Depot. For a step-by-step guide on how to light a charcoal grill, be sure to check out this post.
- Grill the buffalo chicken poppers: Place the poppers on the grill grates over direct heat. It helps to place the poppers such that the length of the pepper runs along the grates – you can cradle a popper between two grates. Grill until the peppers are slightly blistered & charred, & the poppers have warmed through, about 5-7 minutes at 400 degrees F. Use a grill spatula to transfer the poppers to a serving dish.
- Serve: As soon as the poppers are cool enough to handle, serve topped with extra buffalo sauce, ranch dressing, & a sprinkling of fresh cilantro or parsley as desired. Enjoy!
Notes
- Peppers: In making this recipe, I realized that mini sweet peppers vary quite a bit in size! For best results, use larger, round mini sweet peppers as opposed to smaller or flatter peppers. If you’d like spicier poppers, feel free to swap the sweet peppers with jalapenos.
- Baked buffalo chicken poppers: If you’d prefer to bake these poppers, arrange the assembled poppers on a parchment-lined baking sheet for easy clean up. Bake at 425 degrees F for 10-12 minutes, until the filling begins to bubble.
Do you love buffalo chicken wings? Do you love jalapeño poppers? This is the dish for you. A brilliant combination of two of our all time favorite game day sides into one magnificent dish. It’s basically a boneless chicken stuffed inside of a jalapeño popper. Outside of our team winning, there’s very few things that can top these on game day.
11. TAILGATE NACHO PACKETS
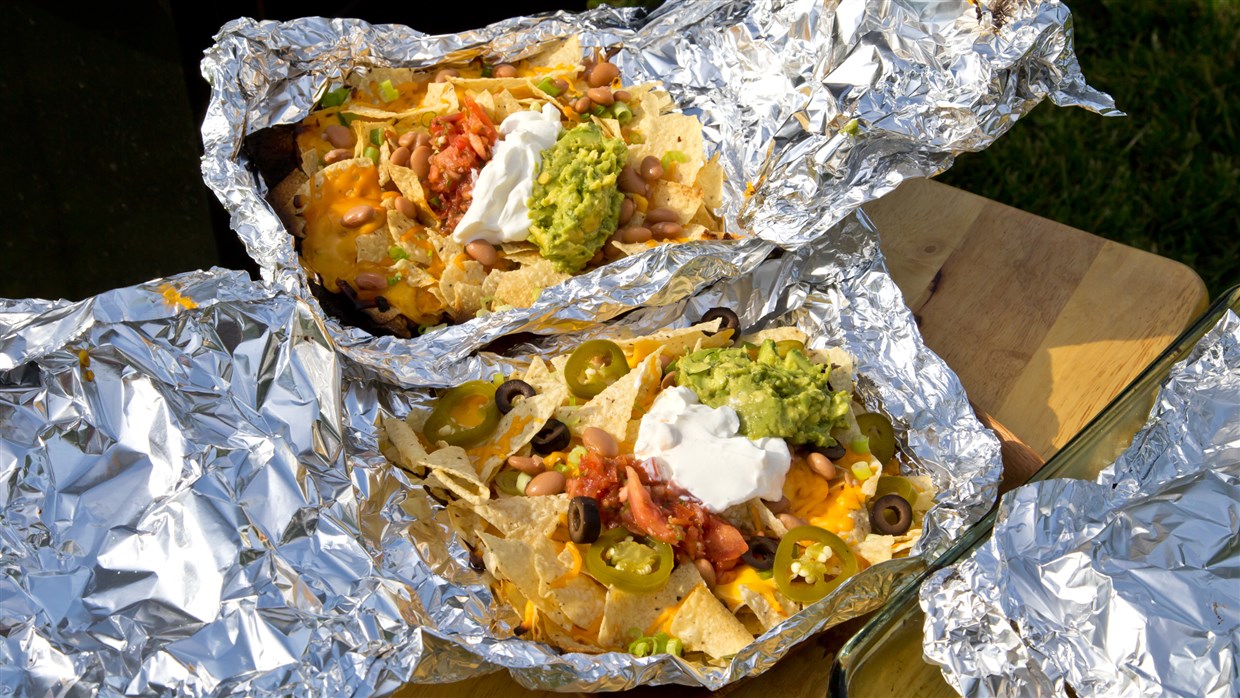
Ingredients
- 16 Oz Bag Of Tortilla Chips
- 8 Oz Shredded Cheddar Cheese
- 8 Oz Velveeta Cheese, cut into 1 inch cubes
- 15 Oz Can Of Black Beans or Pinto Beans
- 12 Oz Jar Of Pickled Jalapenos
- 1-2 (2 1/4 ounce) Cans Sliced Black Olives
- 1 Bunch Scallions
- Salsa
- Sour Cream
- Guacamole
Instructions
- Preheat a gas or charcoal grill to 400 degrees F or medium direct heat.
- For each nacho packet, rip off one 2-foot long piece of heavy-duty aluminum foil (or two 2-foot long pieces of regular aluminum foil, stacked on top of each other) and lay on a flat surface. Crimp the edges of the foil up slightly to make "walls" for the packet.
- Place about 1/4 of the tortilla chips on one side of the foil, leaving about 2 inches of space around the edges so you'll be able to seal the foil packet.
- Top the chips with about 1/2 cup shredded cheese and 1/4 of the Velveeta cubes—be generous with the Velveeta if you like and use the other half of the block if you really want to load it on.
- Fold the foil packet over to enclose the chips and cheese and crimp the edges together to seal.
- Place the packet directly on the grill grates and close the lid. Cook for about 5 minutes, until the cheese is melting and the chips are starting to toast at the edges. (Be careful when opening the foil packets to peek for doneness, as steam may escape.)
- Top the nachos with any or all of your favorite fixings and serve immediately.
Notes
Nachos are a quintessential tailgating food. These nacho packets make it easy. They can be prepped ahead of time, thrown on the grill, and then topped with sour cream, guacamole, and salsa. The packets also double as a serving tray, so you can easily snack while playing tailgating games like cornhole.
12. GRILLED GARLIC BREAD
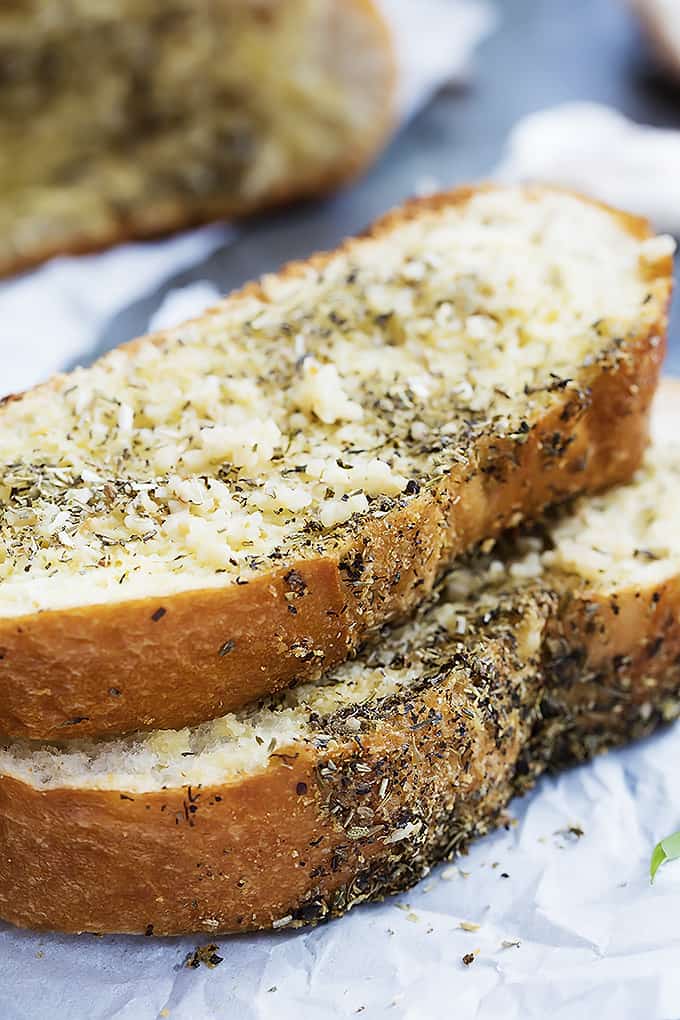
Ingredients
- 1 Loaf French or Italian White Bread
- 1/2 Cup Butter
- 2 Tsp Garlic Powder
- 1 Tbsp Minced Garlic
- 1 Tbsp Italian Seasoning
Instructions
- Preheat grill to low heat. Place bread loaf in the center of a large sheet of foil (big enough to wrap entirely around the bread later). Slice bread into 1 1/2 inch thick slices but do not cut through the very bottom of the loaf, leave about 1/4 inch at the bottom intact so that all of the slices still stay connected.
- Spread butter between each slice and use your fingers to rub some over the top of the loaf. Sprinkle garlic powder between each slice trying to cover as much surface area as possible. Sprinkle minced garlic on top of the loaf and finish off with the Italian seasoning.
- Wrap the bread loosely in the foil (make sure it's sealed shut but has some room for the heat to circulate). Place foil-wrapped-bread on the grill and cook for 15-20 minutes turning over half way through.
- Carefully unwrap the foil, pull bread slices apart and serve warm.
Notes
There’s nothing better to sop up your barbecue sauce than a thick slice of garlic bread. You don’t need an oven to bring garlic bread to your tailgate. With this grilled garlic bread recipe, you can make it right on your tailgating grill. All you need is a loaf of your favorite bread, butter, garlic, Italian seasoning and of course, parmesan cheese. Wrap it up and foil and you’ll have warm melted garlic bread to go with your ribs or steak.
13. GRILLED PEACHES WITH CINNAMON SUGAR
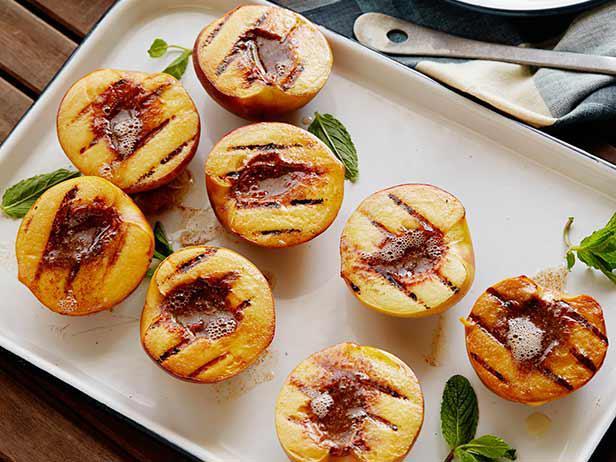
Ingredients
- 1 Stick Unsalted Butter, room temperature
- 1 Tsp Cinnamon Sugar
- 2 Tbsp Sugar
- Pinch Of Salt
- 4 Ripe Peaches, halved and pitted
- Canola Oil
- Mint Leaves, for garnish
Instructions
- In a small bowl add the butter and stir until smooth. Add the cinnamon sugar, granulated sugar and salt and mix until combined.
- Heat grill to high. Brush peaches with oil and grill until golden brown and just cooked through. Top each with a few teaspoons of the butter and garnish with mint leaves.
Notes
Not only can you make delectable side dishes on your tailgating grill, you can also make desserts. One of our favorite desserts is grilled peaches. This recipe tops them with cinnamon sugar and they taste like a fresh peach cobbler. If you really want to take this to the next level, pile on some ice cream and your friends and family will swoon.
14. CILANTRO LIME GRILLED WATERMELON
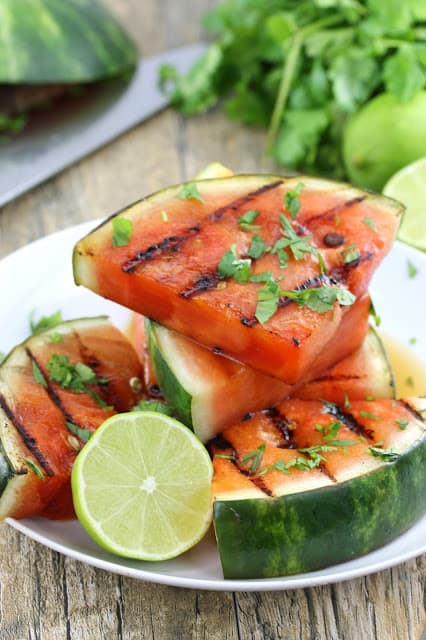
Ingredients
- 2 2 Inch Slices Watermelon
- 2 Tbsp Extra Virgin Olive Oil
- 2 Limes, juiced
- 1/2 Cup Fresh Cilantro, chopped
- Salt To Taste
Instructions
- Cut each watermelon round into 4 pieces, for a total of 8 pieces*. Brush each side of the pieces with olive oil and a little of the lime juice, reserving at least half of the lime juice for after cooking. Season with a little bit of salt (about 1/2 tsp total for 8 pieces, both sides).
- Heat an outdoor gas grill to high heat. Grill watermelon for 3 to 5 minutes on each side, allowing grill marks to form.
- Remove from grill and season with the remaining lime juice and sprinkle with cilantro. Season with additional salt to taste. Salt brings out additional flavor so really do it to taste.
Notes
We know it sounds unusual, but another great dessert is grilled watermelon. Grilling this summer favorite fresh, caramelizes the sugars making for an extra sweet melon flavor. Adding a little cilantro and lime to the watermelon really brings out the sweetness. Try them and you’ll never want to eat watermelon any other way again.
The Easiest Tailgate Recipe Ever
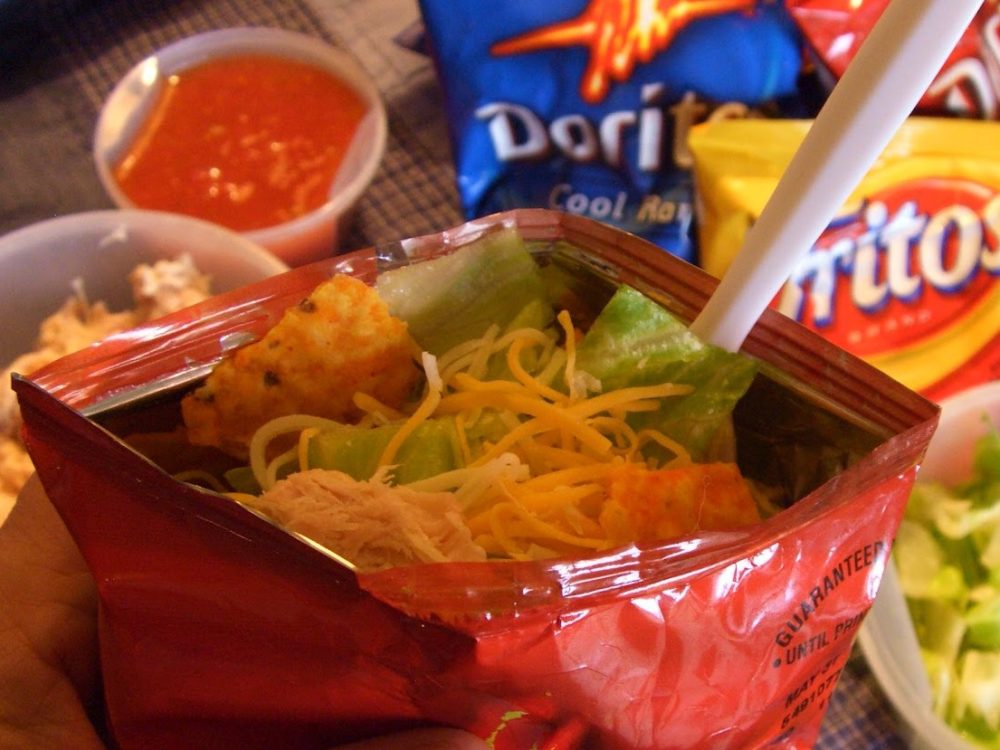
Finally, when we were putting together recipes for this article, we kept asking ourselves: “What’s the easiest tailgating snack we ever made?” The answer was obvious: Walking tacos.
Ingredients
- 1 Lb Ground Beef
- 1 Packet Taco Seasoning Mix
- Chopped Tomato
- Shredded Lettuce
- Chopped Onion
- Cooked Corn
- Chopped Avocado
- Shredded Cheese
- Sliced Black Olives
- Sour Cream
- Salsa or Picante Sauce
- Any Other Toppings
Instructions
- Now that you have all the ingredients, you must select your bag of chips. They all work the same, but I personally opt for the regular Cheese Doritos or Chili Cheese Fritos because I think they add the best flavor. Next, open the bag of chips and give it a few good crunches until all the chips inside have broken at least once or twice. Once you have a nice chip base, add your meat and other taco toppings. After you have your desired taco extras added, roll up the top of the bag and shake it around, mixing everything inside. Open up the bag, grab an eating utensil, and you now have a walking taco.
While burgers and hot dogs are among the top options for tailgate grub, tacos are an underrated choice with just as much flavor and fun. What makes tacos just as great, or even better, is that they can walk along with you wherever you are headed.
Walking tacos are a funky and functional twist on a traditional favorite. Typically, your taco goes in a soft or hard tortilla shell that eventually breaks and crumbles along the food journey. But walking tacos go with you, in a snack size bag of your favorite bag of chips like Fritos or Doritos.
These easy tailgating recipes are all super accessible if you’re low on time or cooking experience, but they’re all impressive so you can kick off football season right. For more recipe ideas for your Super Bowl party, baseball bash, golf-themed tailgate, or anything in-between, check out these recipes. We feature tailgating snacks, recipes, and even beer reviews from all over the country to make your game day planning a breeze. Be sure to follow us on Facebook, Twitter, Instagram and check out our Amazon Storefront.
Let us know what you’re going to make in the comments and have a blast at your next tailgate party!
